Abstract Nature: Personal Project 1

Abstract Nature: What Is Abstraction
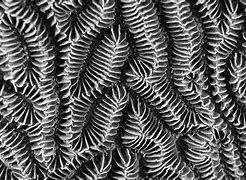
Abstract photography, sometimes called non-objective, experimental or conceptual photography, is a means of depicting a visual image that does not have an immediate association with the object world and that has been created through the use of photographic equipment, processes or materials. Usually, abstract photography focuses on the elements of art and the principles of design. These are also known as the formal elements of photography. Below are some examples of abstract photography that I am drawn to and some research into the formal elements of photography.


INVESTIGATION OF ABSTRACT PHOTOGRAPHY TECHNIQUES/ Monochromatic Photography


|
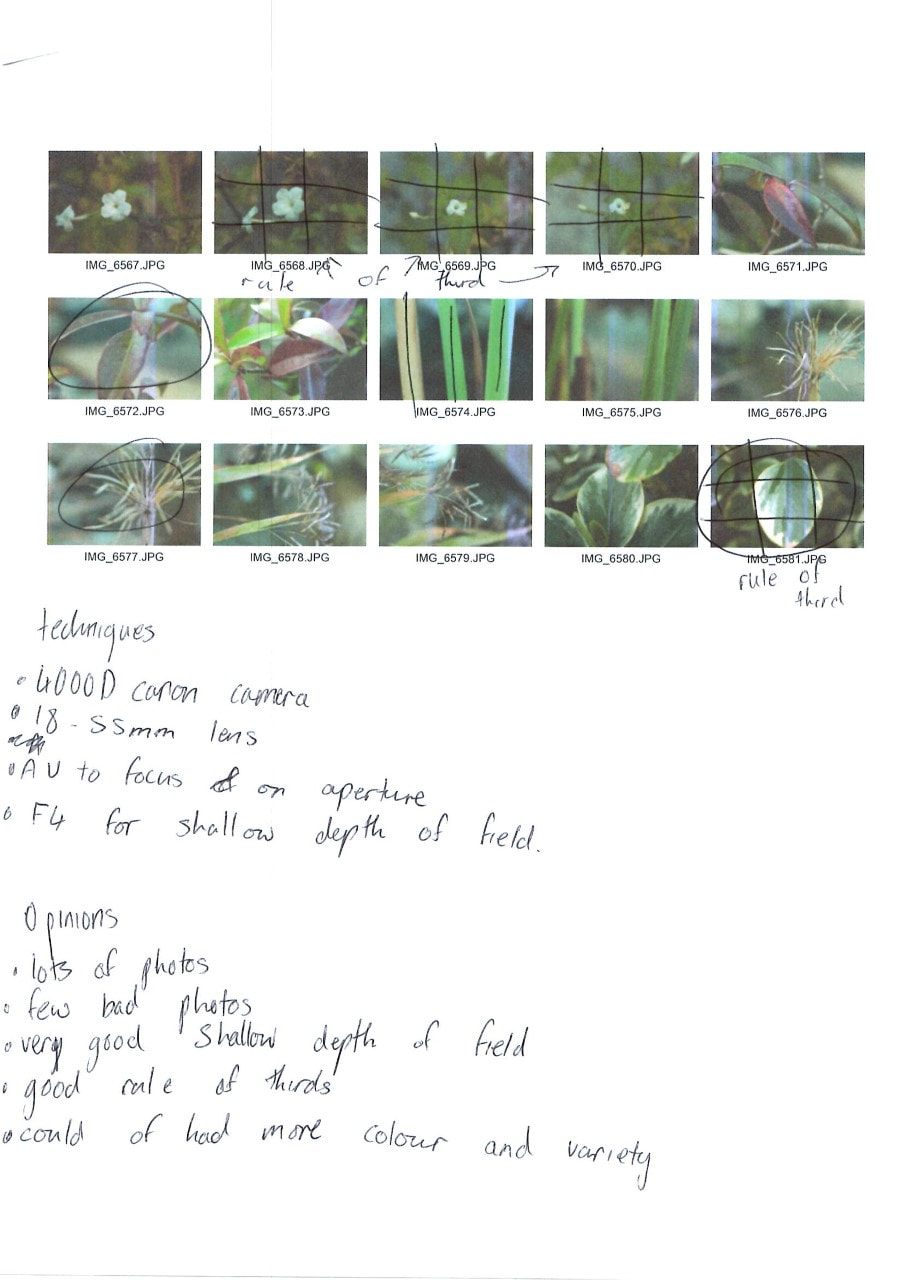
I had my AV mode on my camera and I changed the picture style to black and white. I also set my aperture to the smallest number which is going to give me the widest aperture. In this case my F stop was at F4. For my shoot, I got up close to many different styles of plant and begun taking my photos. I made sure all my photos were completely natural form and I did not have anything like concrete or buildings in the frame. I took photos of all different leaf types, focusing on the ones that looked different from the rest with dots, lines, or maybe it was a dying leaf. I also took some photos of the tall plants that were shooting up far above the rest of the plants. For this I made sure to shoot upwards as to not get any buildings in the background of my photograph. Some of my weaknesses of this shoot were that I could of added more images and managed my time more effectively and I might edit my photos further on pixlr. I think my strengths were very good rule of third work and good lining up with my images for example making everything even with the leaves in my images. |


|
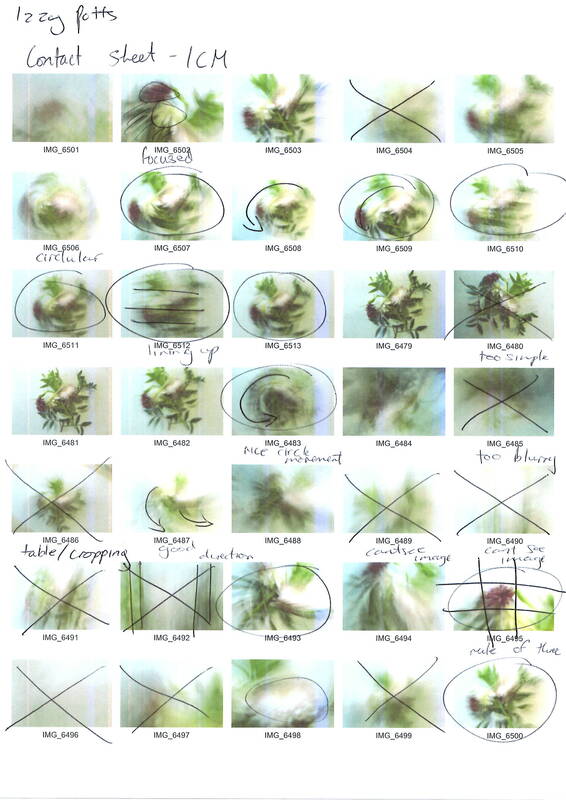
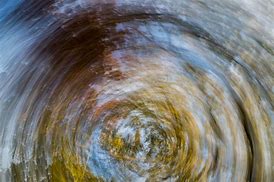
INVESTIGATION OF ABSTRACT PHOTOGRAPHY TECHNIQUES/ ICM
|
|


|
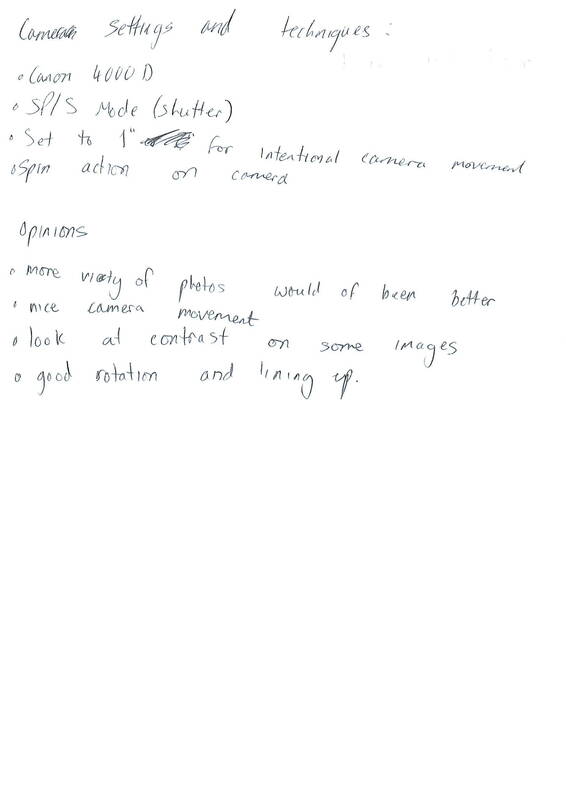
For this shoot I used a 4000D canon camera and a kit lens of 18-55mm. I set my camera to SP/S so i could focus on shutter speed. I finally set my camera to 1" for intentional camera movement and begun my shoot. I started by placing a bundle of flowers on a white piece of paper and took my photos while moving my camera in different directions. I moved around my flowers to create different angles and get the best shots possible. I focus on some flowers closer up to get a more direct approach and for some photos I included all of the flowers. I started by moving quite a lot and quite fast which I found created a much more blurred photo than what I was aiming for. So I moved it much slower and I realised it was just what I needed so I kept at it and got some really cool photos. I tried many different directions and angles to get the most different and abstract photos as a could and I think it came out very good. |

|
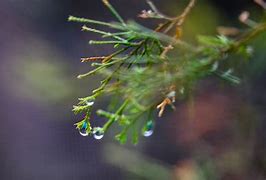
INVESTIGATION OF ABSTRACT PHOTOGRAPHY TECHNIQUES/ Shallow Depth of Field

|
|


|
For this shoot I used my 4000D canon camera and 18-55mm lens. I set my camera to AV to focus on aperture and set to F4 for shallow depth of field. For this shoot I had to be careful with my timing because it was being very wet and rainy throughout the time I was supposed to do it so I had to time it very well so I did not get wet and ruin my camera. I did manage to find a time slot to do it in and I got close to the plants in my garden and took photos from lots of different angles to get the best photos possible and I would say they came out very well and I think this shoot is the best out of all the shoots I have done so far! My weakness from the shoot would be the none natural form backgrounds, in some of my photographs the background of the image is a wall or a fence and I think my photoshoot would of come out much better if the backgrounds were much more natural. My strengths would be not only the variety of photographs but also the shallow depth of field came out amazing and I am very proud of it. |
|
Investigation of Elements / Photography Shoot (Line, Pattern, Tone)
BEST MONOCHROME EDITED IMAGES:

|
I chose this image as my best because it is very appealing to the eye and have a nice rule of thirds. It is also all natural form and has very good use of line.
My weaknesses of this image would be how not all of the leaves are lined up well and I could have used the flash on my camera for a more unique lighting. For my after-shoot editing I changed the levels, cropping, curves, tint and other final touching up of my image. |

|
I chose this image as one of my best because it is interesting and can be interpreted in different ways. It is also all natural form and has very good use of tone.
My weaknesses of this image would be how not everything is in focus and I could of done this on a day with better weather to see if it would create a different look to this image. For my after-shoot editing I changed the levels, cropping, curves, tint and other final touching up of my image. |

|
I chose this image as one of my best because it is very detailed and how it is a good use of line. It is also all natural form and has very good use of contrast.
My weaknesses of this image would be how the leaf is not perfectly straight and I could of added more leaves in the background to see if it would create a different look to this image. For my after-shoot editing I changed the levels, cropping, curves, tint and other final touching up of my image. |

|
I chose this image as one of my best because it is a good use of line. It is also all natural form and has very good use of harmony.
My weaknesses of this image would be how not everything is in focus and I could of added a more variety of leaves in the background to see if it would create a different look to this image. For my after-shoot editing I changed the levels, cropping, curves, tint and other final touching up of my image. |
Artist Investigation / Edward Western
"Why limit yourself to what your eyes see when you have an opportunity to extend your vision?" - Edward Weston

|
To begin my Abstract Nature Artist Investigations, I will initially study the work of Edward Weston because his work is film photography rather than digital which helps me to learn more about photography and how it used to be. Edward Weston was born on the 21st of March 1886 and is mostly known for because he is one of the most innovative and influential American photographers. I chose this inspiration quote because it sums up the work of Weston because it shows his passion for what he did. This video is inspirational to me because that is why I chose photography myself.
|
Below are a selection of 10 Weston images that are inspirational to me because they include many different elements of art and photography. They also include so much detail on things that most people would simply brush by and ignore, so I feel like it zooms in on the beauty of the world.


SEMI Analysis / Edward Weston
|
The Photographer of this image is called Edward Weston and he named the title of this photograph Pepper No. 30 which dates back to 1930; the genre of this image is abstract still life. The props I can see in this picture are one green pepper the is very abstract and deformed and it it placed on a dark plain background.
The composition of the photo shows that the pepper is very central and there is not anything in the background to distract from it, making it the focal point. The viewer’s eye is lead around the photo because of the composition & perspective that Weston has used. Your eyes are also drawn around the curves and bends of this image. The perspective that Weston has taken the photo from is slightly above eye level. This perspective is effective because it helps to show as much of the object as possible without making it too abstract, therefore distracting from the image. |


|

The photographer employs a range of visual elements in his work. The most striking elements are tone, line and shape. The tone of this image is what makes it so intriguing since it is a monochrome shoot it draws all you attention to the shape and lines of the image, rather than focusing on the colours. Some more evident elements to this piece are line and shape - these visual elements go together in harmony, really complimenting each other in this photograph. The different curves and bends of the pepper are really what makes this image so interesting and beautiful.
This photograph has been taken from a short distance so your attention is immediately focused on the green pepper. But upon further notice you can begin to see what kind of set up Weston has used, which based on the rounded platform and the scratches all along the bottom, is a plant pot. To show this, I have drawn on the image in red and blue as you can see on the left.
The In this photograph, the light source is coming from the top right corner which adds a nice shine to the pepper. This makes the most prominent and protruding parts stand out, therefore adding more depth to the image.
Edward Weston enjoyed taking images of abstract looking fruit and vegetables, meaning the do not look quite how they are supposed to. For example in this image, I have highlighted the interesting bends and curves of this pepper in green to emphasize the subject of Weston's image. Another way Edward Weston has drawn attention to the strange shape of this pepper is that he shot the photo monochromatically (black and white) which stops peoples eyes going to the colour of the image and more the shapes and textures, to help show this I have included a monochromatic colour swatch on the right.
Technical Processes / Low Key Photography

|
Low Key photography is a very challenging form of photography and people can often mix it up with High Key photography. Low Key photography often adds drama and emotions to an image. To create Low Key photographs its important to have a dark background and a steady camera. As for the camera settings its up to the photographer but it is recommended to use a low F/number and a fast shutter speed. Most people assume this style of photography is restricted to monochrome images but a pop of colour can really bring an image to life.
|
Shoot Plan / Edward Weston

|
Edward Weston has inspired me to do this shoot because he has a very minimalistic approach to photography and I wanted to attempt to emulate his work. For this shoot I will set up a plant pot on dark card to imitate Westons work. I will then place the pot to face the window for natural lighting that will cast shadows on my vegetables perfectly. Next, I will add my fruit or vegetable then begin taking photographs. For this shoot i set my camera settings very specific such as a low ISO, a fast shutter speed and a small aperture.
|
Contact Sheet / Edward Weston
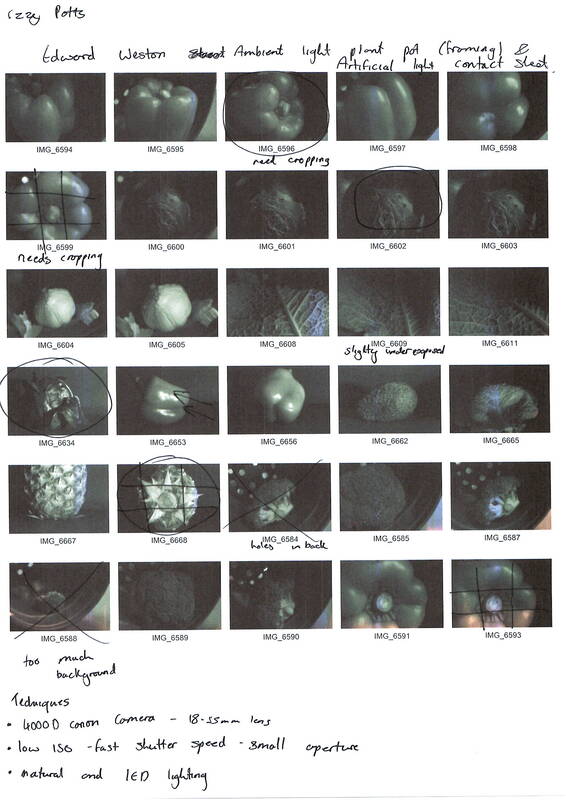
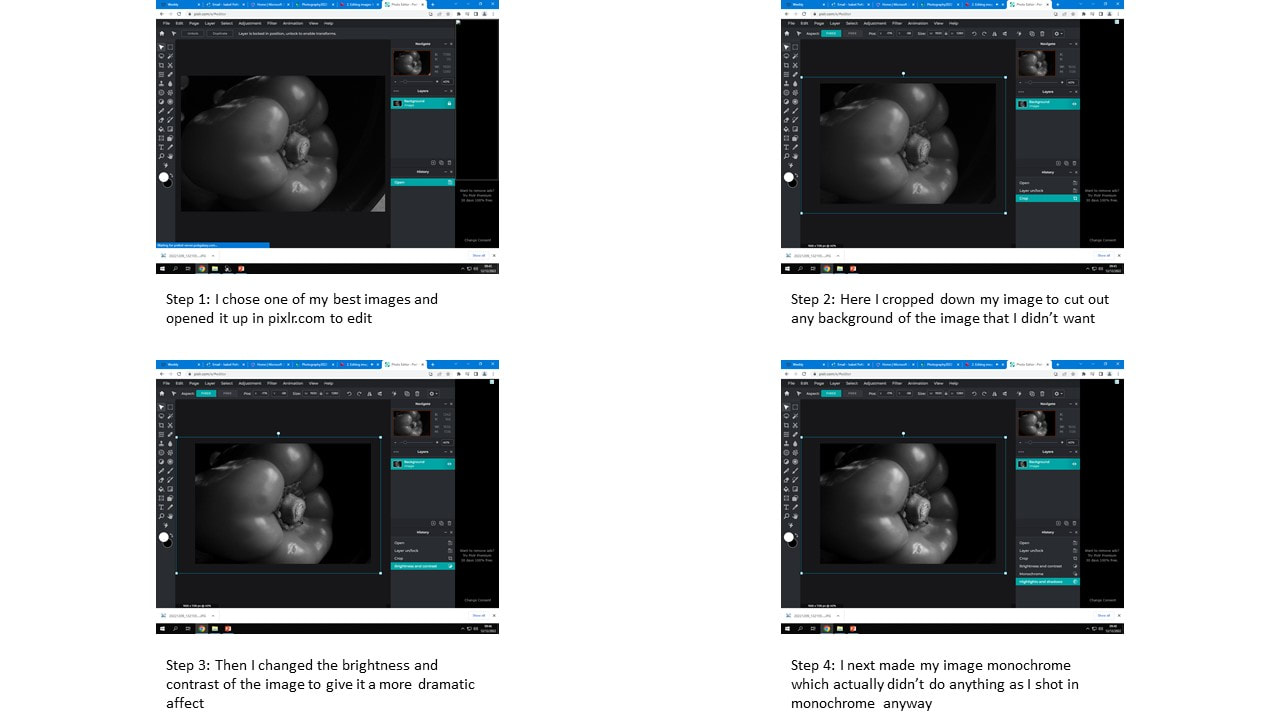
Editing Process / Edward Weston
Best Images / Edward Weston

|
I chose this image as one of my best because it has good highlights in the image, making it have a good use of contrast. It is also similar to Edward Weston's images as I used a bell pepper like he did. A weakness of this image is that it is not from the same angle as Weston's pepper image so next time I would try to emulate his work more accurately. For my after-shoot editing I cropped, changed the brightness and contrast, enhanced the monochromaticity, adjusted the curves and levels and finally deepened the background of my image.
|

I chose this image as one of my best because it has very good rule of thirds and has a lot of detail with this onion as it has a lot of texture. A weakness of this image is that its very dull with little highlights and I could of done further editing to prevent this. It also has light coming through the back of the plant pot which takes away from the main purpose of the image. For my after-shoot editing I cropped, changed the brightness and contrast, enhanced the monochromaticity, adjusted the curves and levels and finally deepened the background of my image.

I chose this image as one of my best because it has good rule of thirds and is quite an interesting approach to the image as I shot the bottom of the pineapple. A weakness of this image is that you can see the edge of the background as a fine line which distracts from the pineapple. So, next time i will do some further editing to try smooth out that line of find another way to make it less noticeable. For my after-shoot editing I cropped, changed the brightness and contrast, enhanced the monochromaticity, adjusted the curves and levels and finally deepened the background of my image.

|
I chose this as my best image as it has good use of tone as it has deep tones and much lighter which adds a lot of contrast to the image. I think this is the best image of them all as it has a lot of texture in the image also. A weakness of this image is, like the last one, the fine line where the background meets which I think distracts from the main image. For my after-shoot editing I cropped, changed the brightness and contrast, enhanced the monochromaticity, adjusted the curves and levels and finally deepened the background of my image.
|
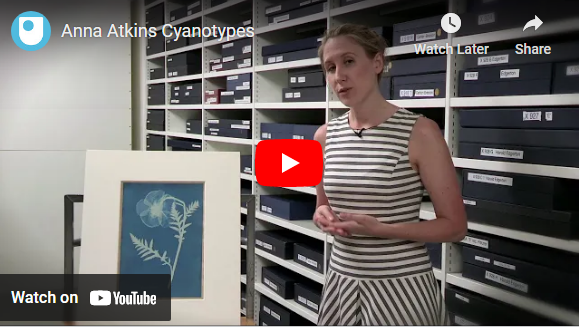
Abstraction through Cyanotypes / Anna Atkins
|
Anna Atkins was one of the first female photographers ever, living from 1799 to 1871. She took her photos through Cyanotypes where she placed an iron salts solution onto thick paper. This was at a time where for photographs to be taken it had to include many bad chemicals such as boron. She would then place an object, usually dried out flowers, onto the paper and let it bake in the sun. Then when this object was removed it would of created an image with a dark blue background and the object would be a lighter blue, showing the image clearly. Bellow are three of my favourite images from Anna Atkins work.
|


Abstract through Photograms / Man Ray
|
Man Ray was an American Photographer and painter. He was born in 1890 and he died in 1976. He took his photos using photograms, these are pictures produced with photographic materials, such as light sensitive materials, but without a camera. The advantages to photograms are that it creates a unique look that cant be created using a digital camera. However, it must be a bright and sunny day to create these images, otherwise you must use LED lights which can be very expensive. Meaning you can mainly only do this in summer time. Below are three of my favourite images from Man Ray.
|


Horst P. Horst / The Unfamiliar and Abstracted


|
The image on the left is my final outcome work on my cyanotypes. I started this work by researching and analysing Anna Atkins to learn about her work, i then began to emulate her work using an iron salts solution and painting it onto thick paper. This is because when Anna Atkins used to take photographs it was at a time where for photographs to be taken it had to include many bad chemicals such as boron. I then placed dried out flowers onto the paper and let it bake in the sun. Then when the flowers were removed it created an image with a dark blue background and the object would be a lighter blue, showing the image clearly.
I then repeated this process many times on different pieces of paper and even on a piece of fabric. I think the image on the top left is my best as it has a clear image of the dried leaves I used and I like the pattern on it. Next time I would experiment with different patterns using the salt solution. |

|
Technical Processes / High Key
|
A high-key image consists of primarily of light tones, without dark shadows. A photograph or painting like this creates a tonal range of primarily whites and light greys.
Using high key lighting gives your image a unique look. These photos are perfect for creating a happy feeling when the viewer sees the image. If you want to convey a sense of joy, high key lighting is typically the best way to do that. To get the best image it is helpful to set specific setting on you camera before taking the photographs, such as having the remote flash 1/8 of power, 1/50 of a second shutter speed, F16 aperture and ISO 100. |


Karl Blossfeldt - Artist Research

The greatest glory in living lies not in never falling, but in rising every time we fall. |
I chose this artist because he works in high key photography and that is what I am studying at the moment. So it relates to what I am doing at the moment and I can emulate his work in the future. Karl Blossfeldt was a German photographer and sculptor. He is best known for his close-up photographs of plants and living things, published in 1929 as Urformen der Kunst. He was inspired, as was his father, by nature and the ways in which plants grow. |


Karl Blossfeldt / SEMI Analysis
|
SUBJECT
My chosen photographer is called Karl Blossfeldt. He was born on June 13th 1865 and he passed on the 9th of December 1932, he was a German photographer and sculptor but was mainly known for his close-up photographs of plants and living things. The title of this photograph is Acanthus mollis (soft Acanthus, Bear's Breeches. Bracteoles with the flowers removed. Enlarged 4 times.) 1898-1928. The genre of this photograph is a monochromatic portrait photo of still life. ELEMENTS The photographer uses the 7 elements of art in his work to create this photograph. In my opinion the strongest elements are line, shape and tone. I think line is important in this image because of the almost perfect curve of the leaves on the plant, shape is also important to the image in this way. I also chose tone as a important element of this photograph because it adds depth and detail, which is very important with high key photography because there is so much light involved sometimes the shadows can be lost completely. MEDIA The main focal point of the image is the interesting curves of this flower. I can tell this because it is arranged in an even and symmetrical way. The circular leaves on the plant are in the foreground as i have highlighted in green on the right hand side. Then the stem and the other leaves are mainly perceived as being in the background, adding depth to the image. I think this set up of the plant was an engrossing method created by Karl Blossfeldt that made an interesting picture out of a simple plant. I believe this photo has been taken inside using bright lights because of the almost artificial look to the photograph. I can see that the light is coming from multiple angles creating a very detailed and exposed image that has little to no shadows. INTENT I feel this photo gives a message of innocence because of the almost perfect symmetry of it; almost as if it has not been exposed to the harmful and damaging world and it is still protected and pure. When I take my own photographs i will try to recreate this atmosphere by choosing fragile natural forms and trying to use symmetry and rule of thirds in my work. |


|
Shoot Plan


|
I have drawn inspiration for this shoot from Karl Blossfeldt because I have been studying his techniques on making abstract images from nature and I would love to emulate his work.
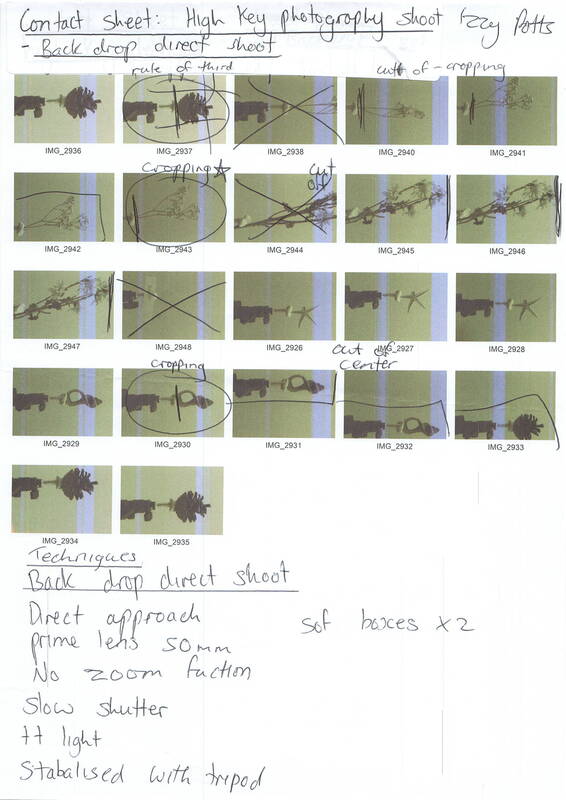
I plan to have the shoot in school at mid-day as the room I shall do it in has many windows for a bright natural lighting for my three shoots on high-key photography. I will use a white backdrop on all my shoot and I will shoot mainly natural forms that have heads and shells because that is what Blossfeldt used and it also gives my images more texture and line. I will shoot in high-key for all my shoots, using a combination of soft boxes, remote flash, perspex diffusers and natural ambient light. I will need to control the lighting so I don't have any shadows on my subject matter and I will distance my subject from the backdrop. I will use the prime lens 50mm and my own camera which will be a DSLR 4000d. I intend to shoot in sepia (picture styles setting) to give an aged look to the photoshoot. In all of the three shoots I will aim to use a slower shutter speed to let more light into the camera lens but will stabilise the camera with a tripod/books so finer details can be captured. |


Karl Blossfeldt / Contact Sheets
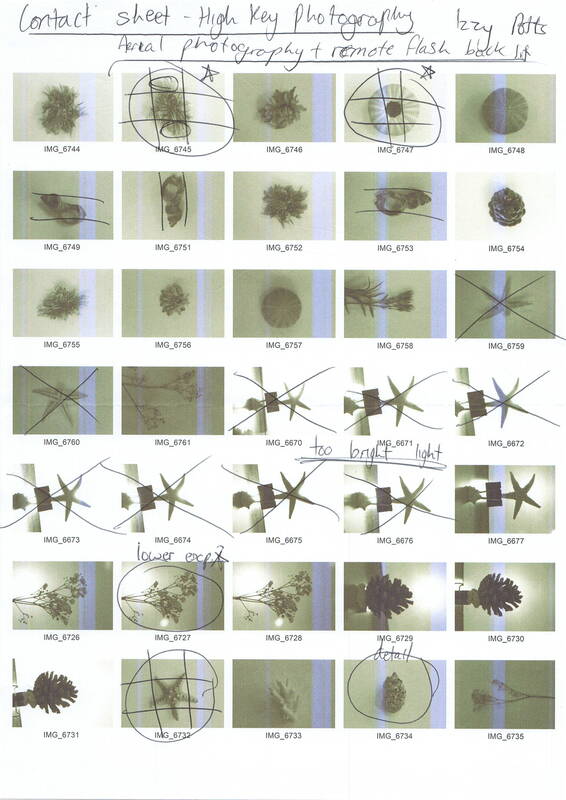
|
|

Editing Process / Karl Blossfeldt
To edit my Karl Blossfeldt images I used an online editing tool called PIXLR. Below is my editing process:

1. Cropping the image using rule of thirds

2. Using the magic wand tool to edit the background

3. Adjusting the levels of the image to create a range of tones and contrast
Karl Blossfeldt / Final Images


Karl Blossfeldt / Final Images Extension Overlays


Final Outcome / Explosion Sketchbook

|
|
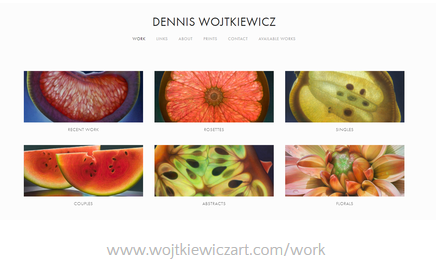
Artist Research / Dennis Wojtkiewicz


|
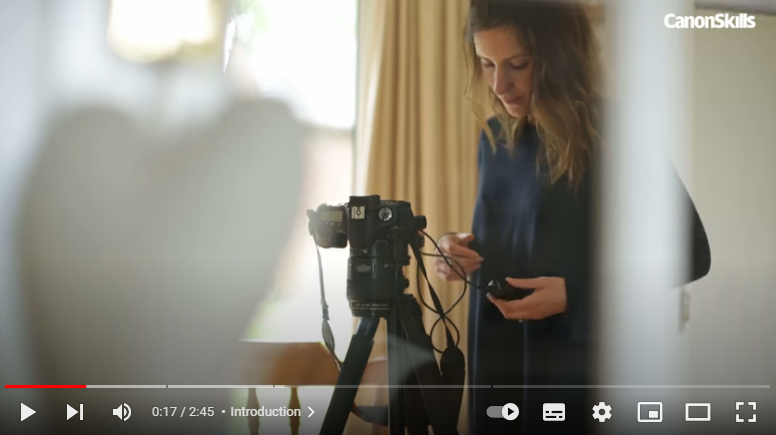
Email Quote – Direct Artist Response The final artist in the Abstract Nature project is Dennis Wojtkiewicz. This artist differs from my other artists because he is really a painter yet he uses photography first to get a more realistic paintings. However, there are similarities in his use of backlit photography that I researched in Karl Blossfeldts work. Dennis Wojtkiewicz was born in 1956 and is most famously known for his paintings. His website is: www.wojtkiewiczart.com The quote is from a direct email response from Dennis. W himself. From the email, I was able understand what equipment & techniques he uses such as a Canon EOS 90D camera with a Canon EF 100mm f/2.8 Macro USM fixed lens. This video is inspirational to me because of the detail in his paintings of the mouth watering fruits. His work has a large variety of colours and hues that I would love to attempt to emulate in my own work. |


Photographic Techniques / Back Lighting Fruit
|
Backlighting is a technique photographers use that involves positioning the main light source for a photograph behind the primary subject. The benefits of this style of work is that it emphasizes the depth behind the subject and gives images a greater sense of place. It also highlights the large amount of detail in the subject of the photo, in the case being the fruit. The specialist equipment you need to create back lit fruit include things like reverse ring or macro lens, glass and tripod. Below are the simple steps to create a shoot like this.
|


|
Step 1: Slice the fruit (a kiwi or strawberry), ensuring the slices area even and thin, so the colours will be bright but not over-exposed.
|
Step 2: Lay the slice on the glass set-up, with the light source placed directly under the fruit.
|
Step 3: Adjust camera settings to macro setting, shutter speed (slow), Aperture (f/8-f/12), Low ISO and 2 second timer.
|
Step 4: Take photo using a trigger and receiver to reduce camera shake, creating the best quality photos.
|
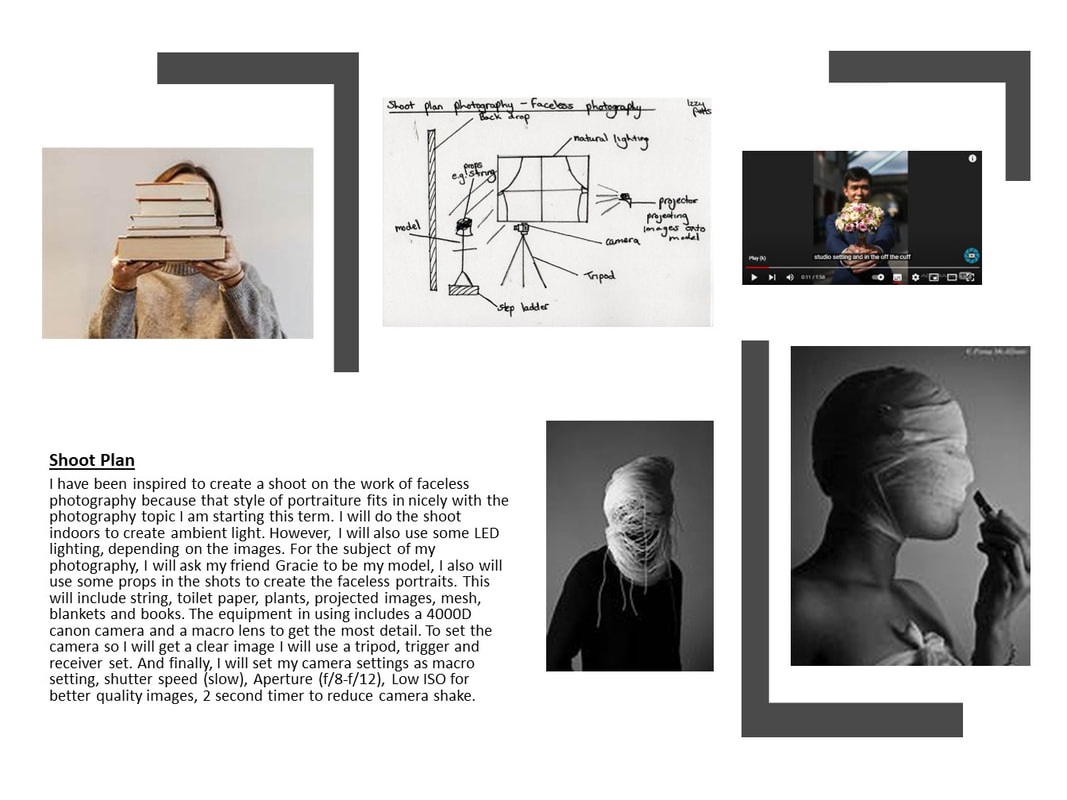
Dennis Wojtkiewicz / Shoot Plan
|
I have been inspired to create a shoot on the work of Dennis Wojtkiewicz because his work fits in nicely with the photography I have looked into so far. I will do the shoot indoors to create ambient light. However, I will also use add back lighting which I will place underneath a glass table. For the subject of my photography I will use thin slice of fruits just in the way Dennis has done. The equipment in using includes a 4000D canon camera and a macro lens to get the most detail. To set the camera so I will get a clear image I will use a tripod, trigger and receiver set. And finally i will set my camera settings as macro setting, shutter speed (slow), Aperture (f/8-f/12), Low ISO for better quality images, 2 second timer to reduce camera shake. |

|
Contact Sheet / Dennis Wojtkiewicz

Post Editing / Dennis Wojtkiewicz

Editing step 1: in this clip, I used the adjustment tool to enhance the colour, saturation and contrast within my image. this helped me to amend my exposure and bring fourth fine details within the fruit.
|

Editing step 2: in this screen shot I used the lasso tool to select the background and fill it into white, this added a strong contrast between the background and my fruit. This also was an important step for emulating Dennis's work.
|

Editing step 3: in pixlr I continued my editing by copy and pasting my fruit image and placing them into a simple pattern, I next flipped and rotated some of the fruits to add a more irregular look to my image.
|

Editing step 4: finally I adjusted the colour on a few of the fruit, making some completely black and white and one with a strong pop of colour, this added contrast and enhanced the colours in my final image.
|
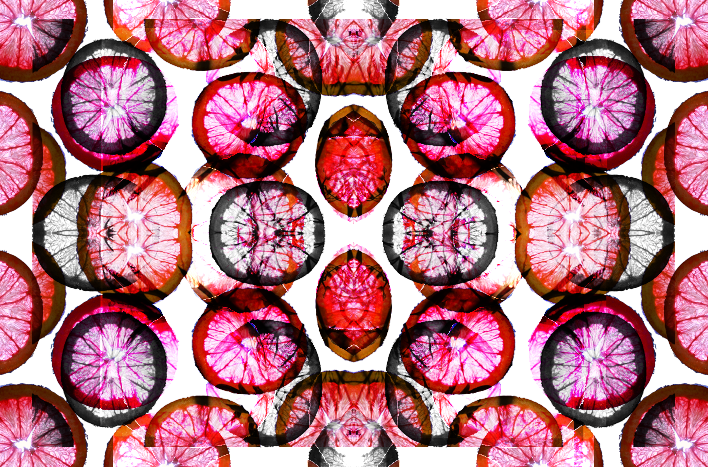
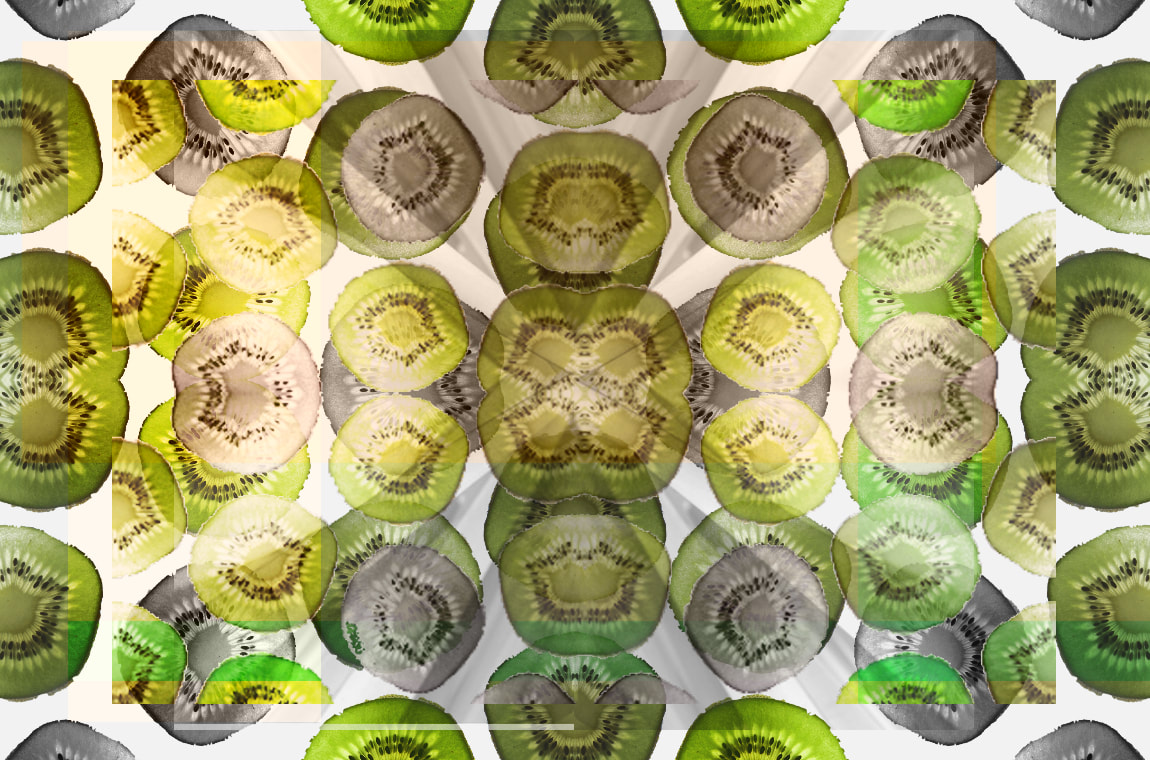
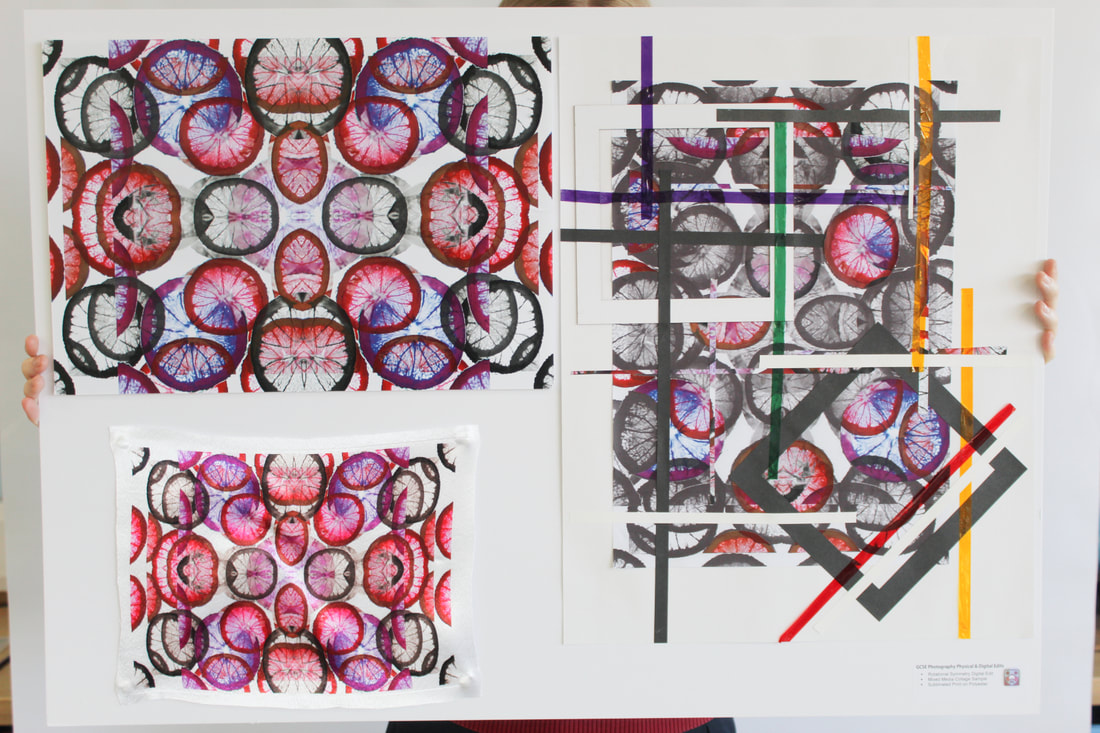
Rotational Designs / Dennis Wojtkiewicz
Using rotational symmetry and the work of Horst P Horst, I have created a series of rotational designs using the abstract elements of shape, colour, form, tone, repetition and harmony. I will develop these further using pixlr.


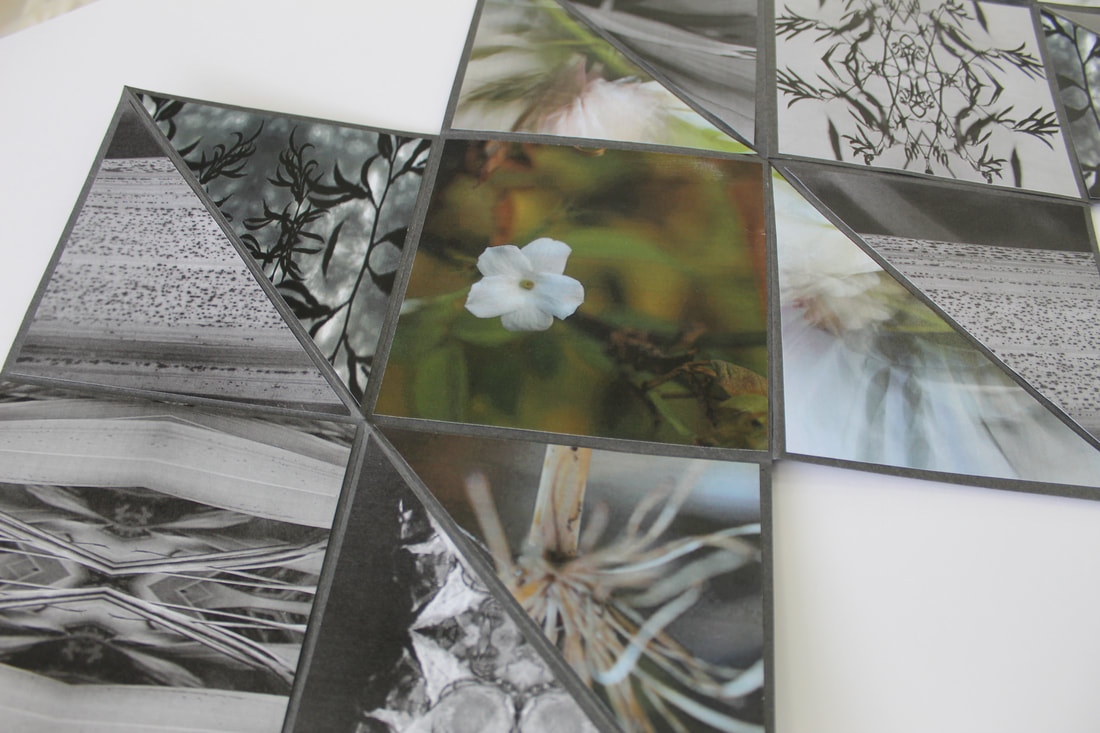
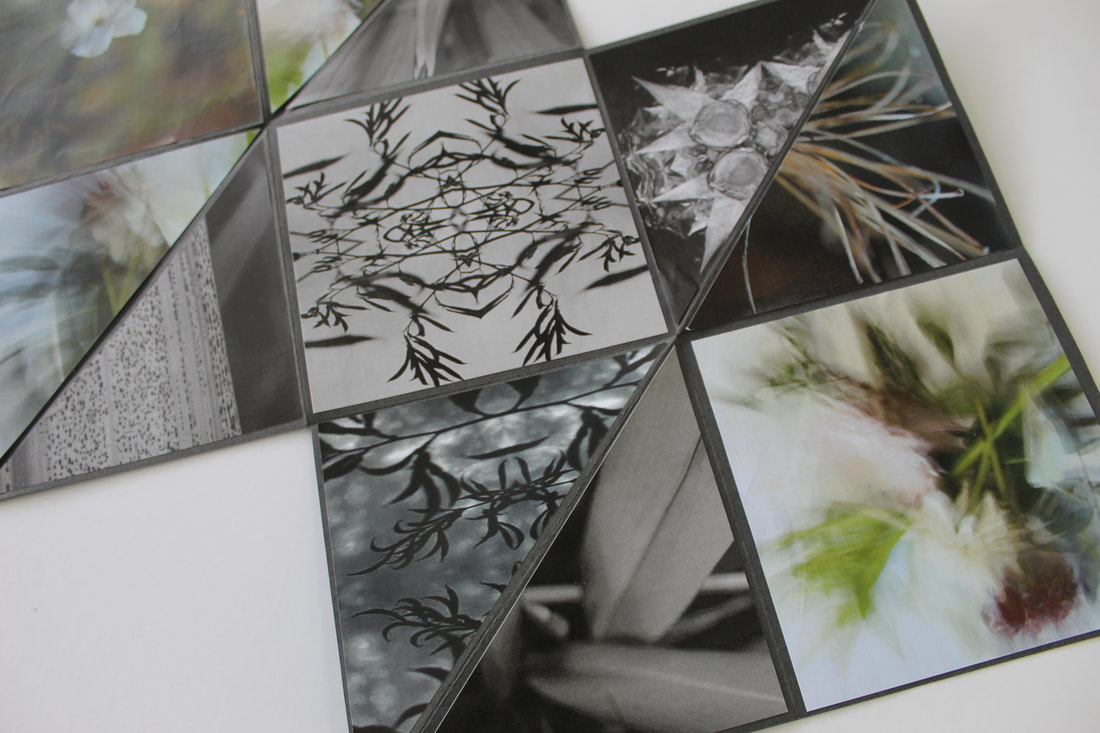
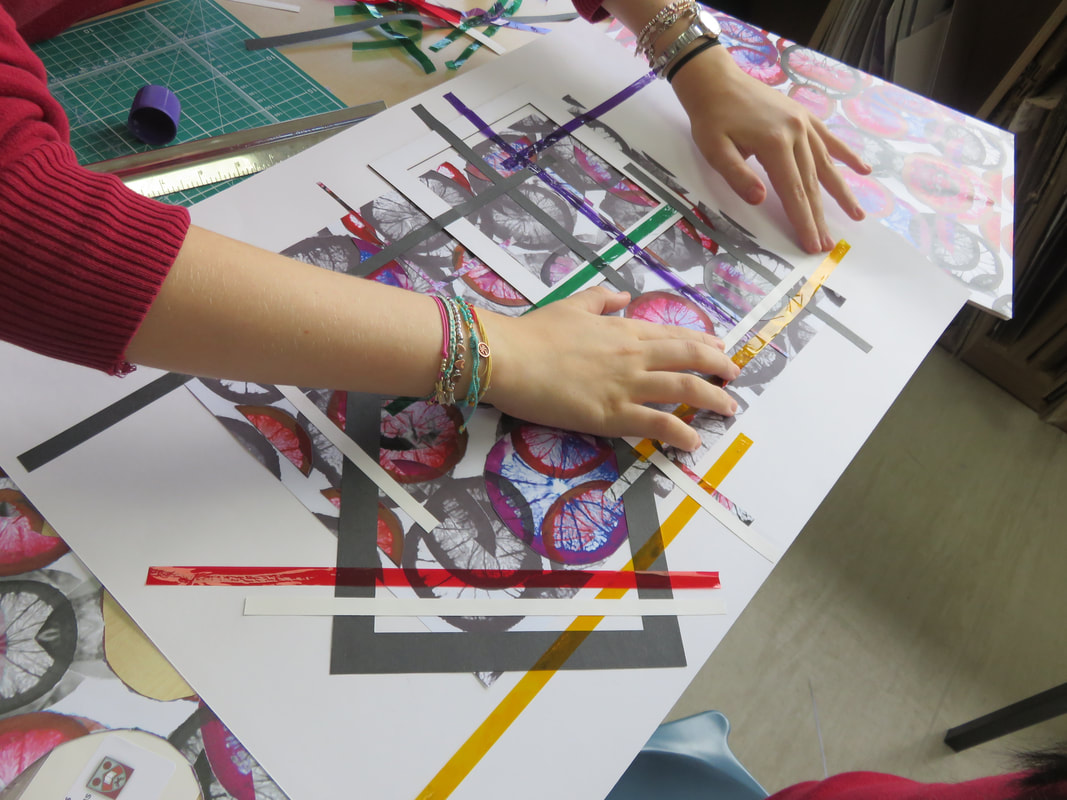
Abstract Nature / Hand Manipulation Sample Boards
Abstract Nature / Final Evaluation
This project I have gained many skills and understanding of abstract nature in photography. Before I started GCSE photography I had close to zero knowledge on digital editing or photographic processes so I feel that I have thoroughly improved and I am proud of how far I have come with my skills. Some of the key skills I have developed include: photography in the absence of a camera- cyanotypes and photograms; lighting- high key and low key photography, and in particular how to effectively use photography to evoke diametrically opposing responses from a viewer.
Throughout this project I have developed my understanding of abstract photography by exploring the theme of nature.
Over the summer I started with a project researching into the work of Javiera Estrada. Her work inspired me with her work on Flur De Sel where she worked with flowers and how she submerged them in water, I though this created a very unique look to her work. For the analysis of Estradas work I looked into colour, pattern and space. Inspired by her work, I created a series of emulations by using the equipment I already had at home, including a bath, paints and of course flowers. I investigated the technical processes of using a camera, digital editing, analysing images in detail and developing my work with the use of contact sheets. Estradas work helped me understand the theme of abstract nature by showing me that there are not any limitations in abstract photography and its important to go at things in a creative way.
Next I researched into the work of Edward Weston and his monochromatic work on fruit and vegetables. Through studying this artist, I was able to explore concepts of tone, line and shape in my own photography examples. After looking into his work in detail, I felt inspired to create a series of emulations by shooting some strangely shaped peppers inside a plant pot to create the most similar images to Westons work. I looked into the technical processes of natural lighting, in depth digital editing and monochromatic photography. His work helped me understand the theme of abstract nature by showing me to look for the "weird" and "unusual" parts of life and put them in a new, positive light that can create some very interesting pieces of photography.
Then I looked into the work of Anna Atkins and her cyanotypes. As I studied this artist, I explored the concepts of colour, shape and contrast. This really inspired me to attempt to emulate her work by researching into photography with the absence of a camera. I got the chance to look into the technical processes of cyanotypes and how photography worked before cameras were invented. Atkins work pushed me to understand that expensive materials are not needed to create abstract photography.
After this I researched into the work of Man Ray and his work which led on nicely from Anna Atkins work. Through this artist, I was able to explore line, shape and contrast in my photography. Inspired by their work, I created a series of emulations. Just like I did with Anna Atkins work, it helped show me how photography first came about, before the use of high tech cameras. Rays work helped me understand the theme of abstract nature by showing me one of the many ways to take photos and how there are no limits.
Then I moved on to study Horst P Horst and his work on rotational symmetry. Throughout studying this artist I have explored pattern, balance and unity. Inspired by his work I used the technical process of online editing to rotate some images of my own from my other shoots. This gave my photographs a whole knew look and I am very glad I learnt this skill. The work helped me to understand the theme of abstract nature by highlighting the impact of after shoot editing and how it can completely transform a piece that may have originally not be one of my top choices, to something I am very proud of.
Next, I studied the work of Karl Blossfeldt. He inspired me because many of his images may be considered simplistic but after looking in much more depth, I have learnt the difficulty of his work. Inspired by this I created emulations of his work in many different ways. This helped expand my knowledge on different photography angles and some of the many ways the create photographs. His work helped me understand the theme of abstract nature as it made me look out for natural forms that could be considered out of place, or "ugly" yet by shining a new light on them, there are ways these plants can be seen as beautiful.
Finally, I looked into the work of Dennis Wojtkietcz and his images with fruit. Through his work, I explored the concept of emphasis and colour in my own photography. Inspired by his work I created my own images and did some editing afterwards. Using all of my skills I put together a lovely collage and used my work on overlays to create a great final piece. His work helped me to understand the theme of abstract nature by teaching me that there is beauty in everything, including day to day things like fruit and vegetables.
Personally, I know I have learnt a number of key skills throughout my time working on this project, including composition, lighting, colour, viewpoints, editing, subject matter, exposure and research. But I think the most successful outcome from my project was my Edward Weston SEMI analysis. I say this because I spent a lot of time on it and I think my research came out very well. Another very successful outcome of this project would have to be my Dennis Wojtkietcz collage, my most recent topic. This is because it shows a wide range of skills and I think it highlights how far I have come if you compare it with my first topic, my summer project.
I think my areas for improvement would be taking more photos during my shoots. I have noticed that sometimes in my photography shoots I can limit the amount of photos I take or get little diversity between these photos. Going forward I would like to improve that I can by stepping outside my comfort zone to get my diverse photos and making sure I get a large amount of images so I have more choice for my most successful ones. Another weakness I think I have shown this topic is how I struggle with the use of my camera. throughout this project I have been limiting myself in the settings on my camera, when I know there are so many options for taking photos I would often go with the safest option and in future I would like the change that and practice more with my camera to get the best skill set I can. However, I think I have done incredibly well this project and so far this year I think I have come very far. I have put 100% effort into all of my work and I really hope it is shown on my website. I have truly enjoyed this project and I am so excited to move on and get started on the next piece of work.
